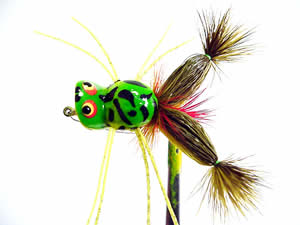
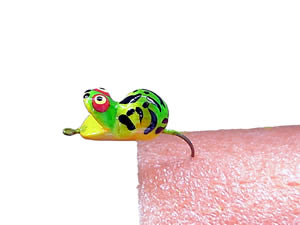
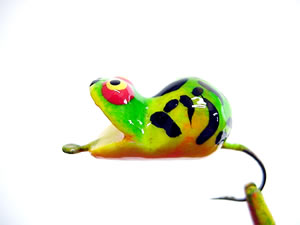
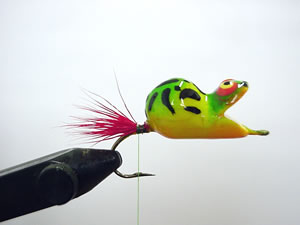
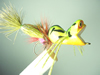
Balsa Frog

|
English Version: Marcelo Rozas
|
Text & Photos: 100 (Sergio E. Marchioni)
|
Contrary to what everybody
think, this fly doesn´t demand artistics skills to make it.
You have to know that after its painting and varnishing,
balsa becomes very resistent. |
This fly is a fly that joins noise, movement and color. The shape the legs provides enough balance on the suface, ensuring its attractiveness. I recommend to use Kink Shank hooks for its durability. |
|
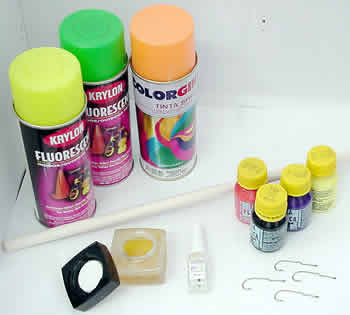
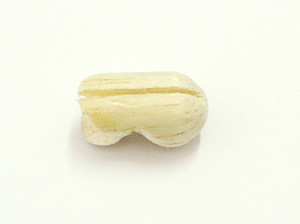
Body Materials: 1- Cilindric balsa stick about 12 mm in diameter 2- Sealer 3- Yellow, green and red spray (used for Expanded polystyrene - EPS) 4- Acrylic or plastic ink to the eyes and details 5- Automotive varnish or transparent nail polish to enhance the body brightness 6- # 6 kink shank hook (I tied on a Mustad 33903) |
|
|
|
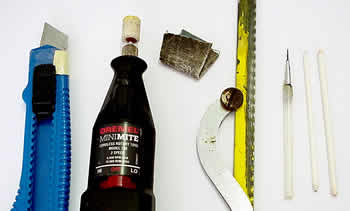
Tools: 1 - Scalpel 2- Dremel (optional) 3- Sandpaper 4- A little saw 5- Paintbrush 6- Sticks in three different diameters (to make eyes) |
|
|
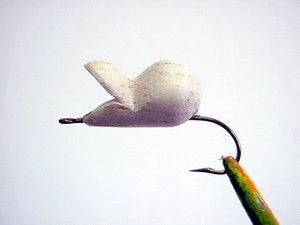
Shape - part 1 - using the scalpel: |
|
|
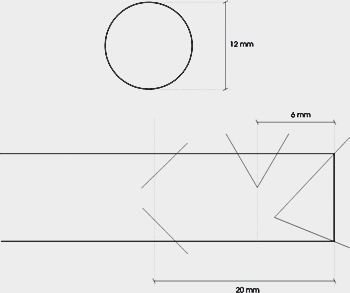
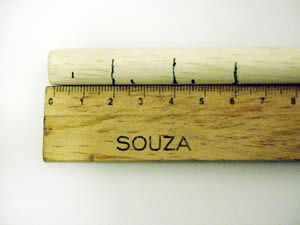
This diagram shows you how to mark the blasa stick to make the body of the frog.
|
|
|
|
|
1- Using a rule, mark the measurements of the frog (in this diagram, there is marks to several frogs) |
|
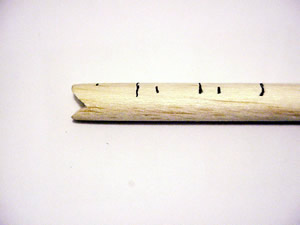
2- The next step is to cut the face of the frog in "V" shape, which depth should be no more than 6 milimeter. |
|
3- Make a groove to give the shape of the head. |
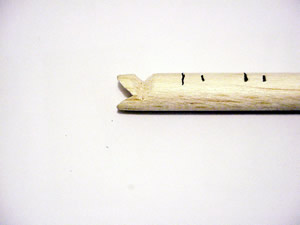
|
4- Make diagonal cuts in the end of the body. |
|
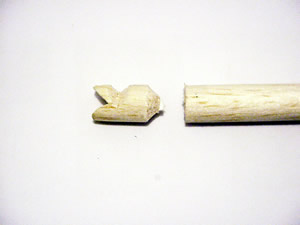
5- Detach the body from the balsa stick. |
|
|
|
|
|
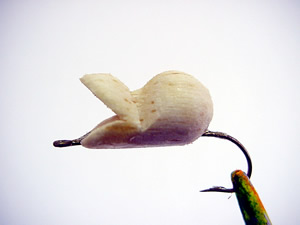
Shape - part 2 - using Dremel or the sandpaper: |
|
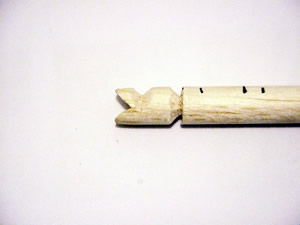
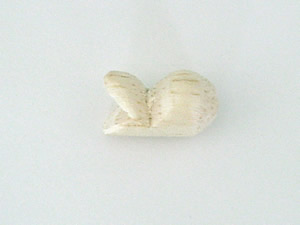
6- Now you have to shape it untill it looks like as shown in tne picture. I use Dremel in this step, altough a sanspaper makes it well. |
|
|
|
|
|
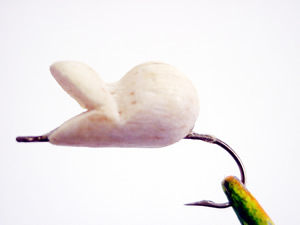
Placing the hook: |
|
7- Make a 3mm groove with a saw in the belly of the body to place the hook, as shown in the picture. |
|
8- Spread Zap-a-Gap gel inside the groove. Let
the it cure after go to next step. |
|
|
|
|
|
Finishing and Painting: |
|
9- Apply a layer of sealer with a paintbrush to get a nice finish, impermeability and resitance to the body. |
|
10- Sand the whole body with a thin sandpaper. Remove the powder with a dry cloth. |
|
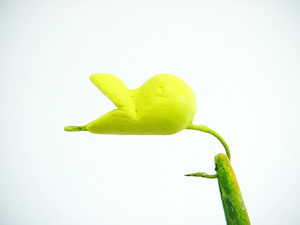
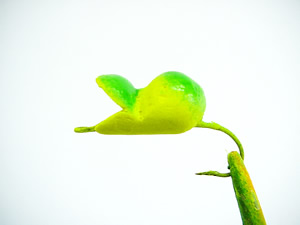
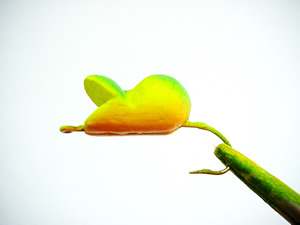
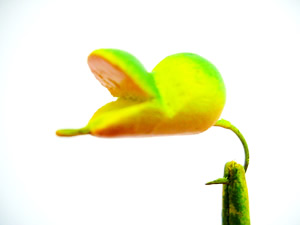
11- Apply a layer of yellow spray in the entire boby of the frog. Keep the bottle away about 30 cm from the body, to avoid the paint to spill and ruin your job. Let it dry! |
|
12- Apply green spray from back to the head (only on top), making a green topping on the body. |
|
13- Aplly red spray from the back of the belly toward the head (only in the belly!) |
|
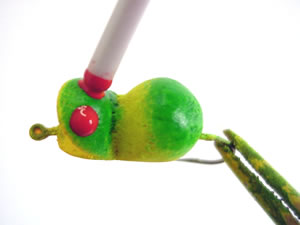
14- Facing the frog to you, apply a subtle layer of red spray in the upper part of the mouth of the frog. Let it dry. |
|
|
|
|
|
Painting the eyes and details: |
|
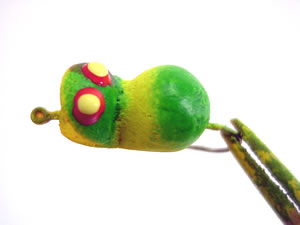
15- To paint the eyes, we will use sitcks mentioned in Tools. Dip the largest stick in acrylic ink, and touch it in the upper side of the head as shown in the picture. Repeat the same in the other eye. |
|
16- With the intermediary sitck, repeat step 15 with yellow ink. |
|
17- With the smallest stick, repeat step 16 with black ink. Let it dry. |
|
18- To have details like a "Fire Tiger", draw several irregular and aleatory spots with black acrylic or plastic ink. |
|
|
|
|
|
Varnishing: |
|
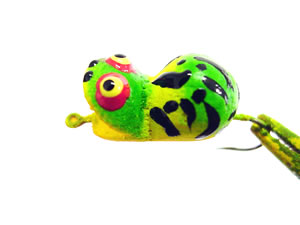
19- To have a better look, with more bright and resistance, you have to varnish all the body of the frog. You can use automotive varnish or transparent nail polish. Three or four layers are enough. Let it dry between the layers in the Fly Turner to avoid the varnish to spill. |
|
|
|
|
|
|
|
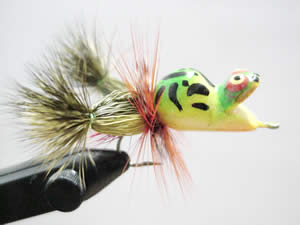
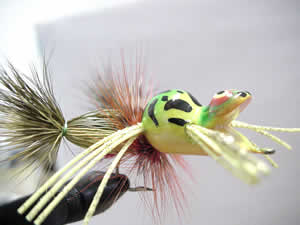
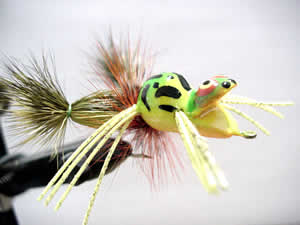
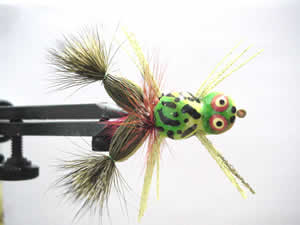
Finalizing the Balsa Frog: |
|
|
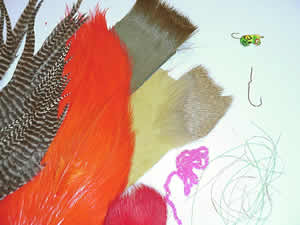
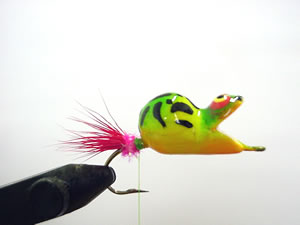
Materiais Utilizados: Hook: #6 kink shank (Mustad 33903) Thread: flat or 3/0 chartreuse Body: balsa wood Collar: 3 hackles (orange, grizzly and orange) Front Legs: yellow round rubber legs displayed in "X" Rear Legs: yellow deer body hair overlapped with olive deer body hair Tail: red deer belly hair Butt: red ice chenille Eyes: plastic or acrylic ink Weed Guard: wire |
|
|
|
|
|
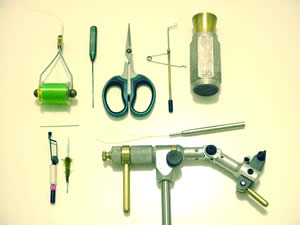
Ferramentas Utilizadas: 1 - Bobbin 2 - Bodkin 3 - Scissors 4 - Whip Finisher 5 - Hair Stacker 6 - Thin needle 7 - Rotary Hackle Plier 8 - Thick needle 9 - Bobbin Threader 10- Vise |
|
20- Tie in the thread on hook shank, resting it in the curve of the hook. Apply flexament. |

|
21- Pick a bunch of red deer hair, stack it in the hair satcker, and tie it as shown in the picture. |
|
22- In the same point, tie in red chenille. |

|
23- Wrap the chenille around the hook shank, secure with the thread, cut the excess and apply flexament. |
|
24- Pick a generous bunch of yellow deer body hair, stack it in the hair stacker and tie it on the top of the hook shank. Tie some knots and apply flexament. |
|
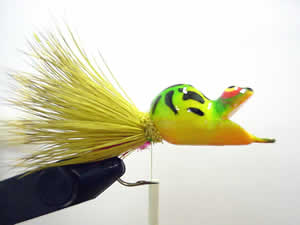
25- Pick a little bunch of olive deer body hair, stack it in the hair stacker and tie it on the top of the previously tied yellow deer body hair, overlapping it. Tie some knots and apply flexament and cut the thread. |
|
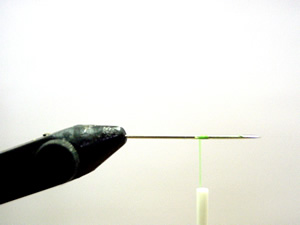
26- Remove the fly, set it apart, and place the thin needle in the vise. Tie in the thread, securing it with 5 or 6 turns. |
|
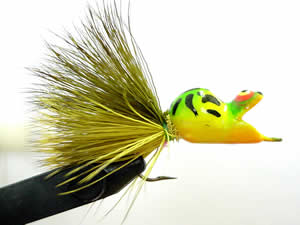
27- Pick up the frog, and with the bodkin or scissors separate the bunches of deer hair in two equals bunches, as shown in the picture. Grap one bunch (that will be one of the legs), place it on the needle and wrap the thread in the first third, to make the segment of the leg. Tie in 3 knots, stretching the thread. Cut the excess and remove the leg from the needle. Apply flexament in the knot. |
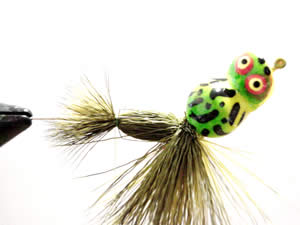
|
28- Repeat step 27 to make the other leg. |
|
29- Place the fly again in the vise and tie the thread between the body and the legs. |
|
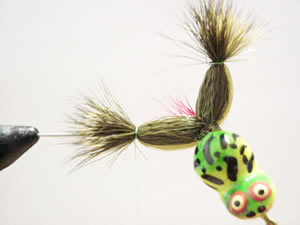
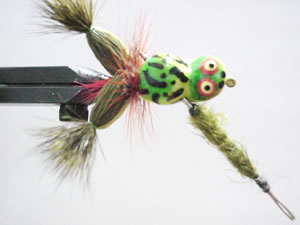
30- Tie in 3 saddle (or neck) orange, grizzly and orange. Tie a knot and apply flexament. |
|
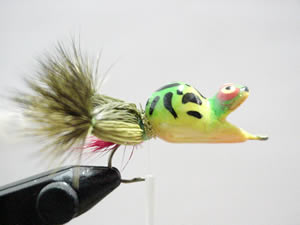
31- Palmer each saddle toward the body, knot it and cut the excess. Glue it. |
|
|
|
|
|
Placing the rubber legs: |
|
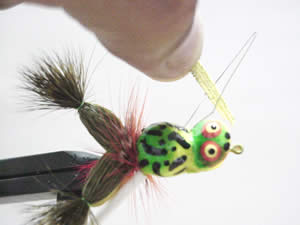
32- Using a thick needle or a thin drill, make a diagonal hole in the body. Repeat the operation in the other side, making the the rubber legs displaying a "X". |
|
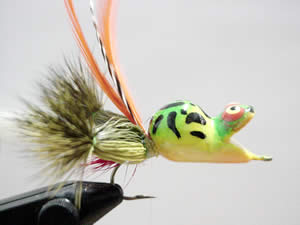
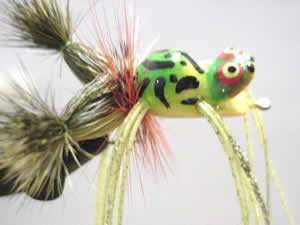
33- Insert the bobbin threader in one of the holes made by the needle (or drill). Insert 4 strands of yellow rubber legs in the loop and delicately pull the threader back. |
|
34- Repeat the operation in the other hole. |
|
35- Adjust the legs and cut it to desired lenght. |
|
|
|
|
|
|
I´m sure that following these steps, you will have not only a very efficient fly, and a state of the art fly. |
|
 Monster Frog |
 Monster Frog Deer Hair Legs |
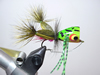 Popper Deer Hair Legs |
 Tube Frog Deer Hair Legs |
 Tube Frog |